
How to create a VPN in Switzerland with a Synology NAS, hosted with Infomaniak
Published on March 15, 2018 by Team Infomaniak
A Synology NAS hosted at Infomaniak lets you create your own virtual private network (VPN) to protect your Internet navigation while enjoying bandwidth exceeding 60 Gb/s! A VPN protects your Internet navigation by encapsulating the Internet connection in a private and encrypted “tunnel”.
In this article you will discover how to create your own VPN server using a Synology NAS hosted at Infomaniak. Once this service is enabled, you can connect using the VPN client of your choice, from your computer or your smartphone.
1 – Installing and configuing a VPN Server
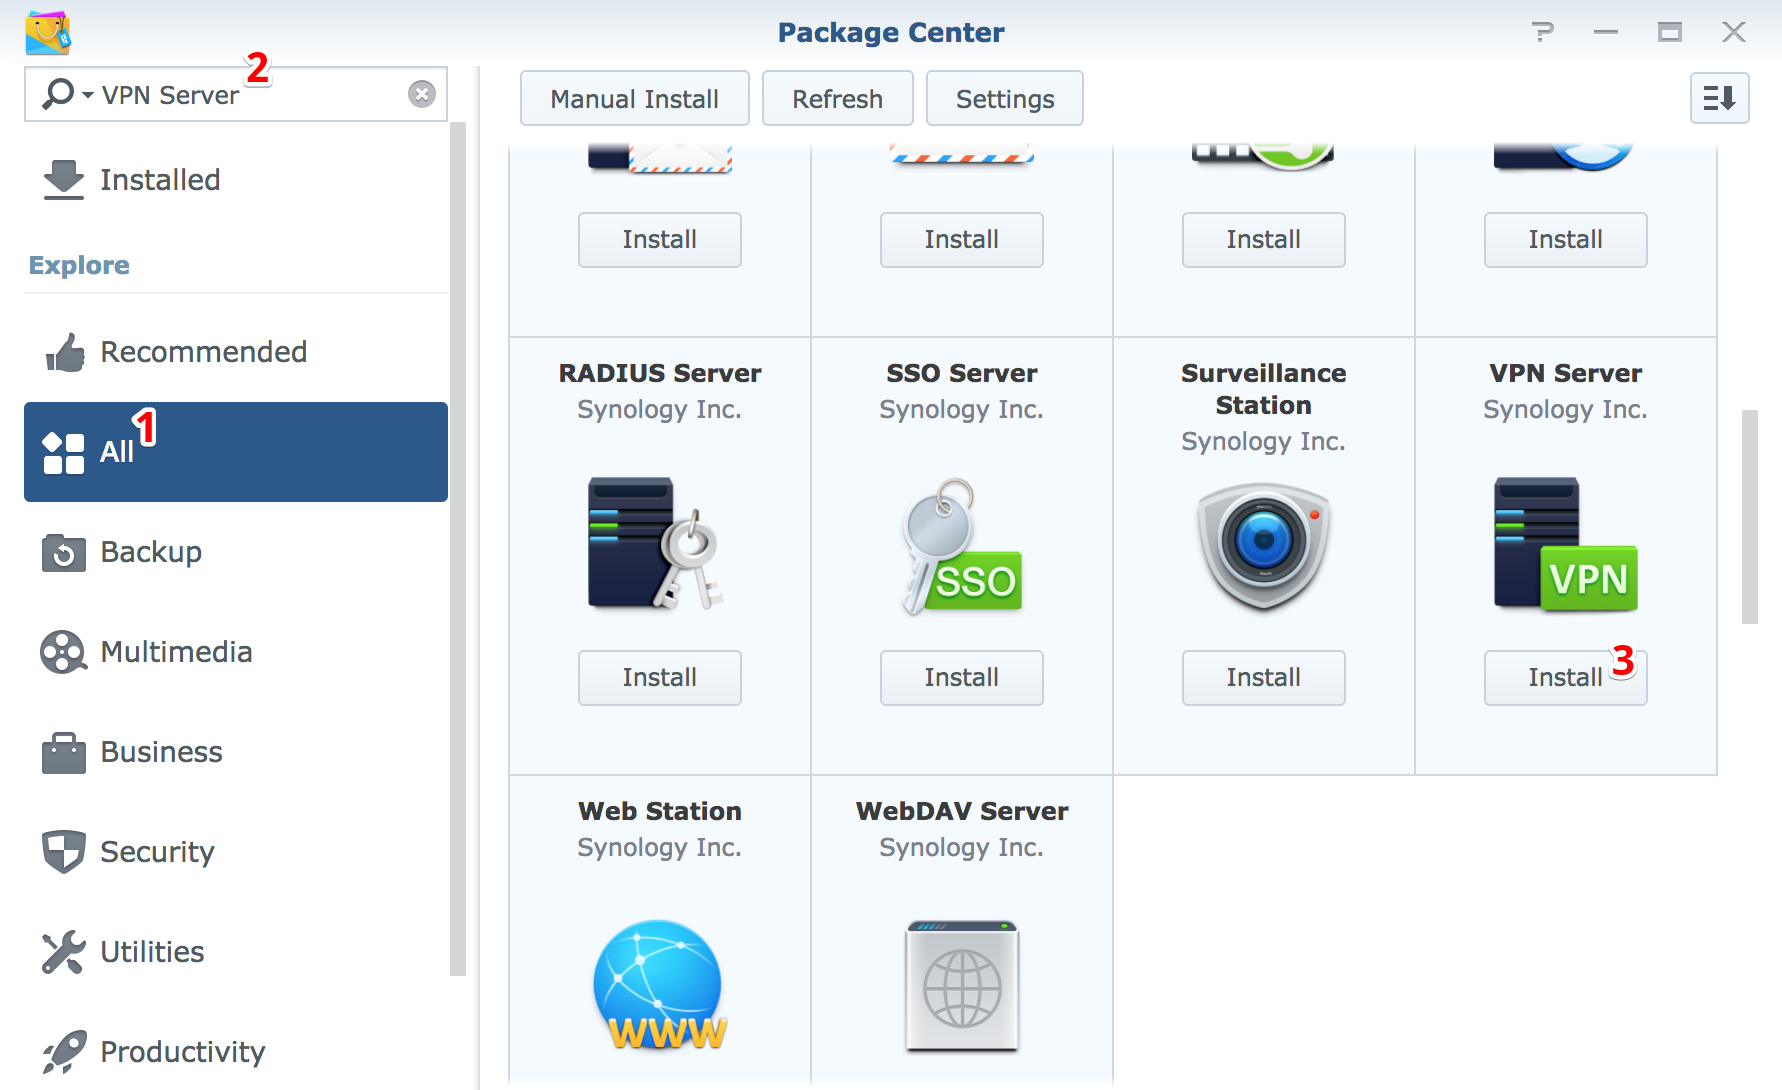
Once connected to the DiskStation Manager (DSM) of your Synology, go to the Package Centre to install the “VPN Server”.
Once the VPN Server is installed, open it to activate the protocol OpenVPN as shown below:
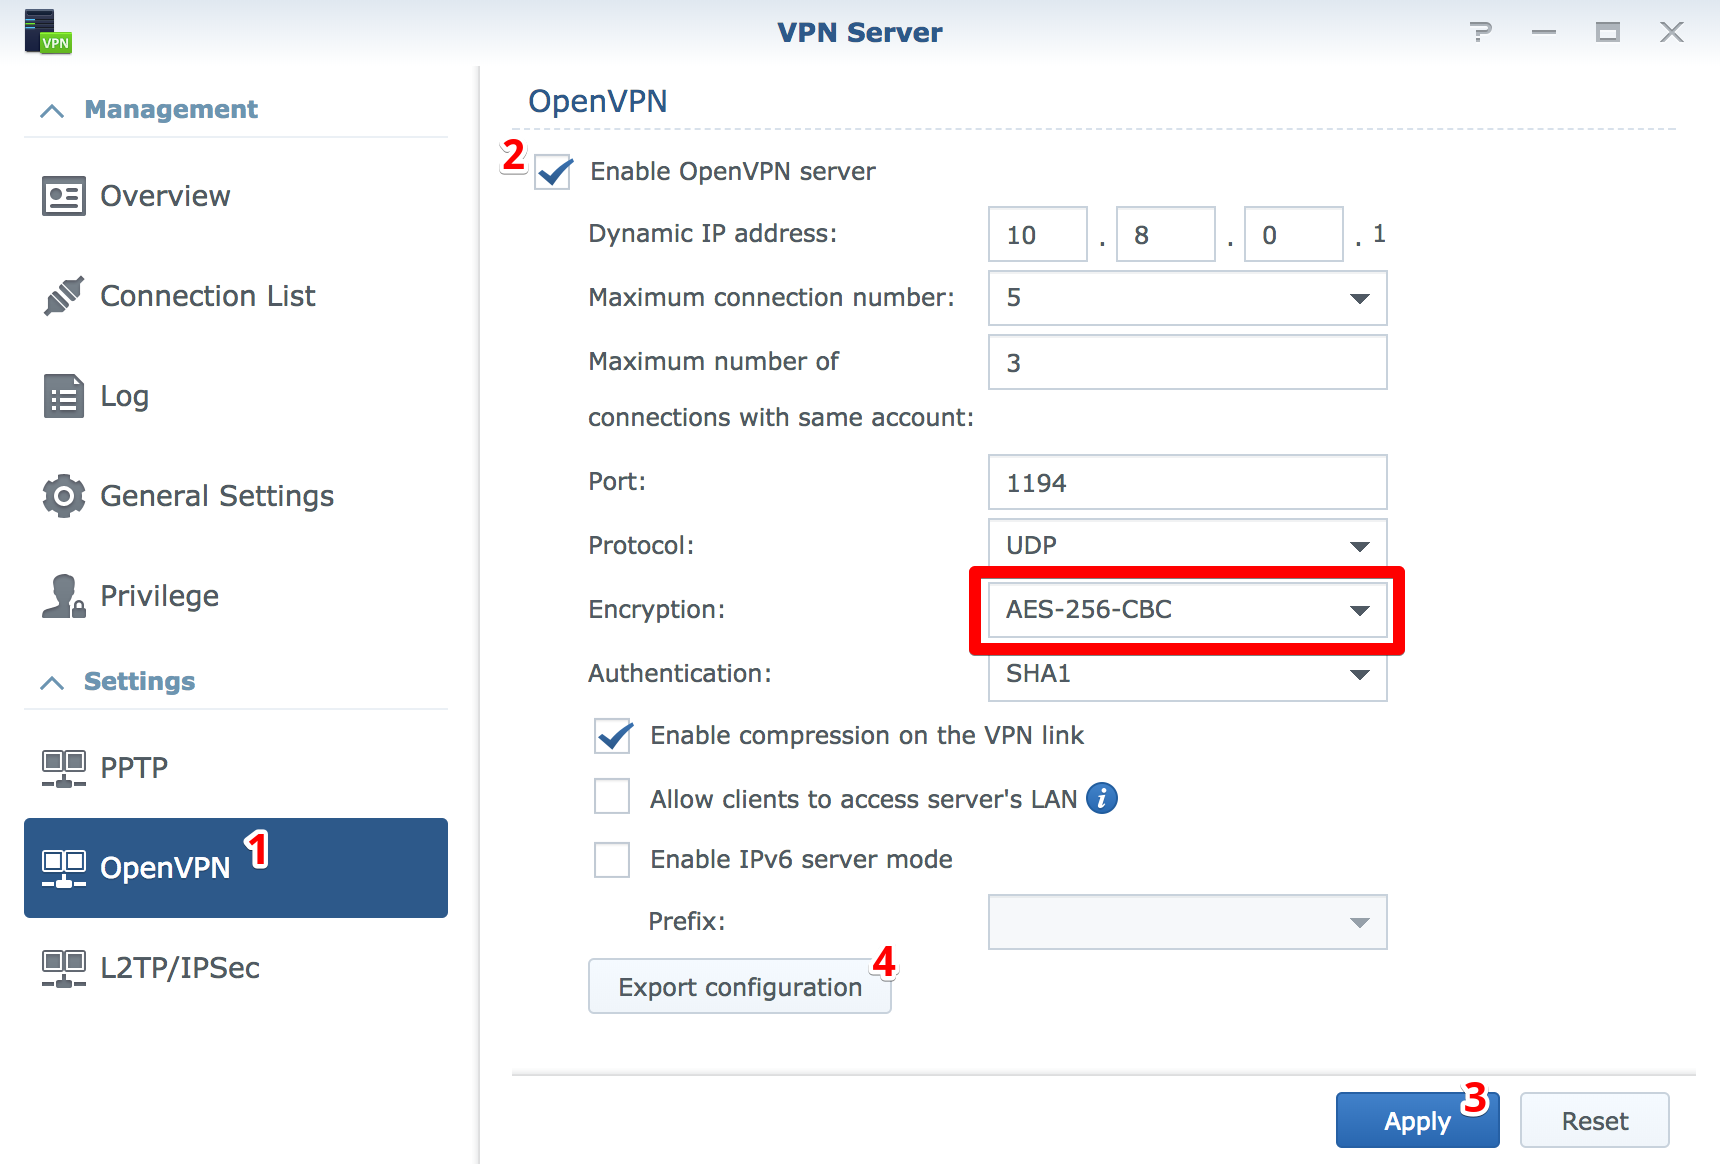
The OpenVPN configuration can be adjusted based on your preferences or left as default. We recommend choosing the encryption AES-256-CBC which offers an increased level of protection.
Once the selections are applied, download the configuration file openvpn by exporting the configuration (point 4 in the image below). We will now see how to edit the file to send the correct configuration to your VPN client.
2 – Editing the configuration file
To edit the openvpn file that you just exported, unzip the file openvpn.zip then open the file VPNConfig.ovpn with a text editor to make the following two changes:
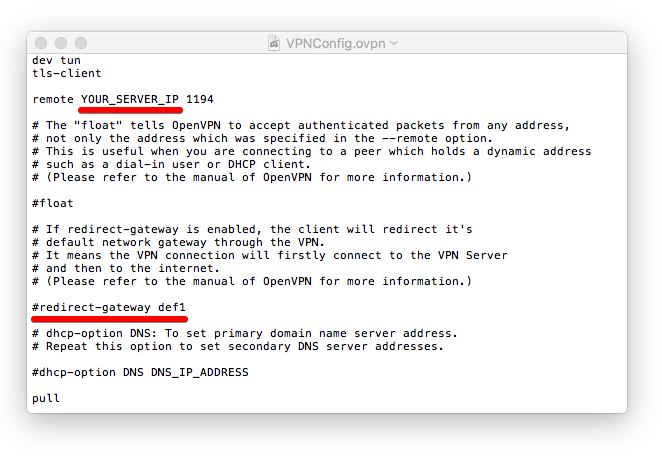
- Replace YOUR_SERVER_IP with the IP address of your NAS (the IP address of your NAS is indicated in the control panel of your Synology).
- Delete the symbol # before the inscription redirect-gateway def1
Then save the changes and keep the file VPNConfig.ovpn for the last step of the guide.
3 – Configuring the NAS firewall
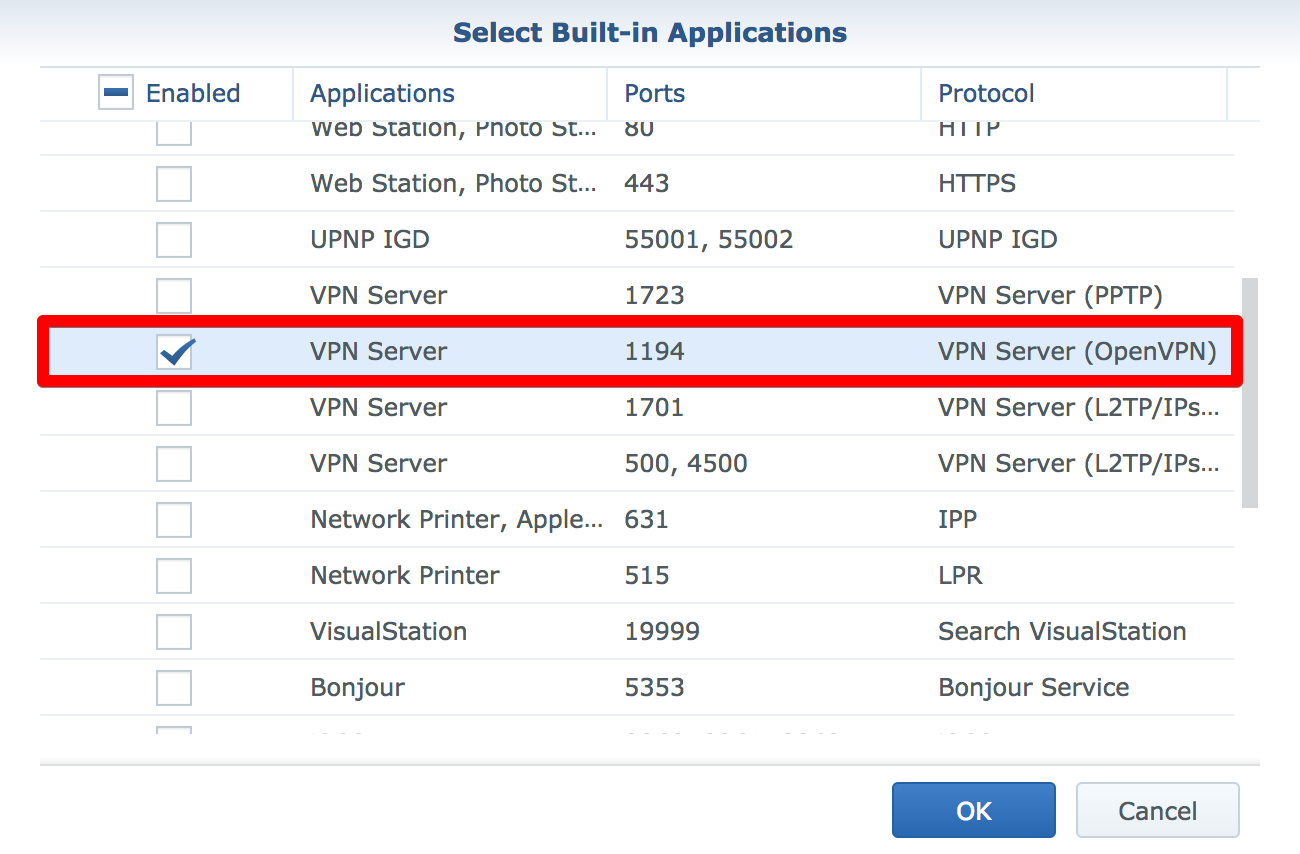
The firewall must be configured to authorise the connection to the VPN Server by your Synology NAS. To do that, go to the firewall settings to authorise the protocol OpenVPN of the VPN Server as indicated below:
In case you need it, this article explains how to configure the firewall of your Synology NAS.
At this point, the installation and configuration of the VPN Server and your Synology NAS are finished. To get connected, you simply need to install your VPN client and configure it using the file VPNConfig.ovpn that you have edited in the previous step.
4 – Connecting to your VPN Server
To connect to your VPN, you will need a VPN client on your computer or smartphone:
- Tunnelblick for Mac OS X
- OpenVPN for Windows
- OpenVPN for Android
- OpenVPN Connect for IOS
To configure your VPN client, simply add the file VPNConfig.ovpn to your VPN client. Once this file is recognised, you can launch the connection to your VPN and authenticate yourself using the user name and password of your Synology NAS.


No comments
No comments yet.