How to configure your Synology NAS to back up your Mac with Time Machine
Published on August 17, 2017 by Team Infomaniak
In this article, you will discover how to easily back up your Mac with Time Machine on your Synology NAS hosted with Infomaniak.
We are going to show you how to create a user for Time Machine and to appoint a shared folder on which the user will store the backup.
Configuring a Synology NAS for Time Machine
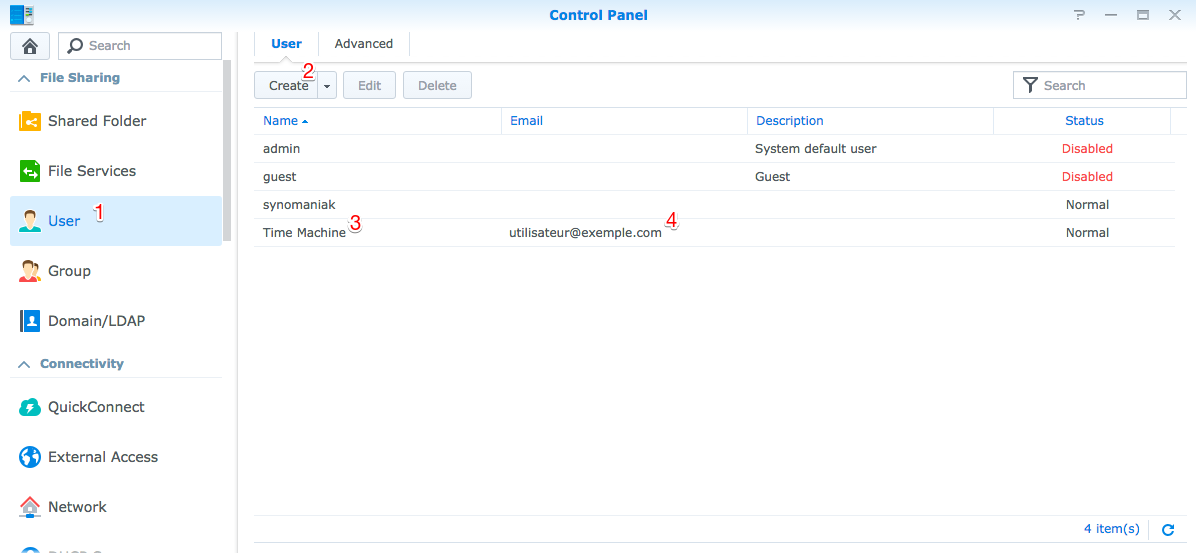
1. Creating a user dedicated to Time Machine
2. Defining the storage capacity to be allocated

The quota must be at least two or three times the size of your Mac’s hard disk or of the amount of data which must be stored.
3. Defining the authorisations

Finally configure the Synology firewall by following our security recommendations.
4. Creating a shared folder
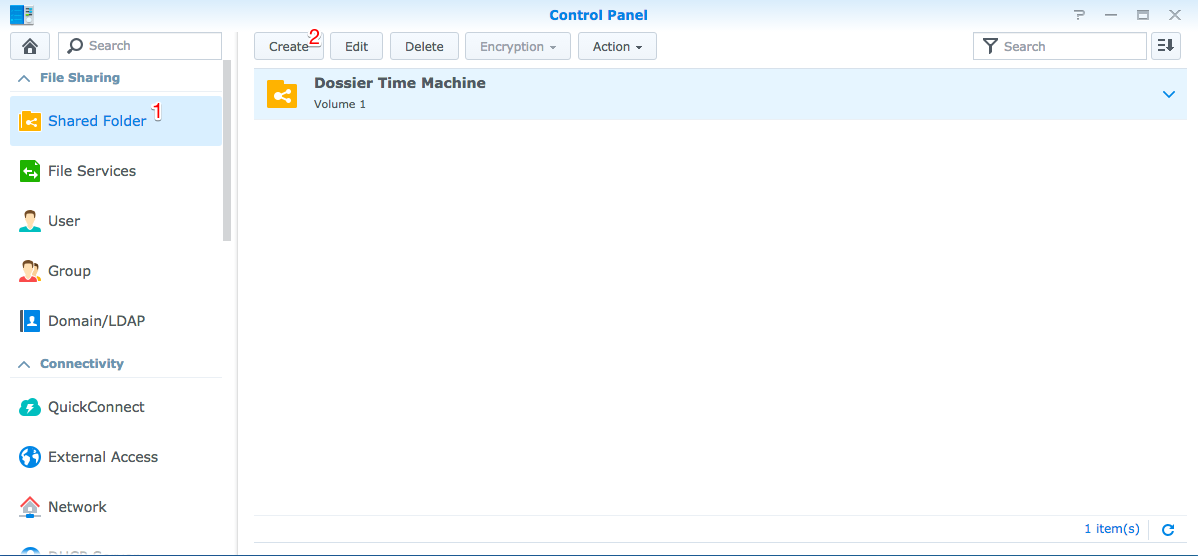
Define the read and write permissions on your backup folder.
5. Enabling services
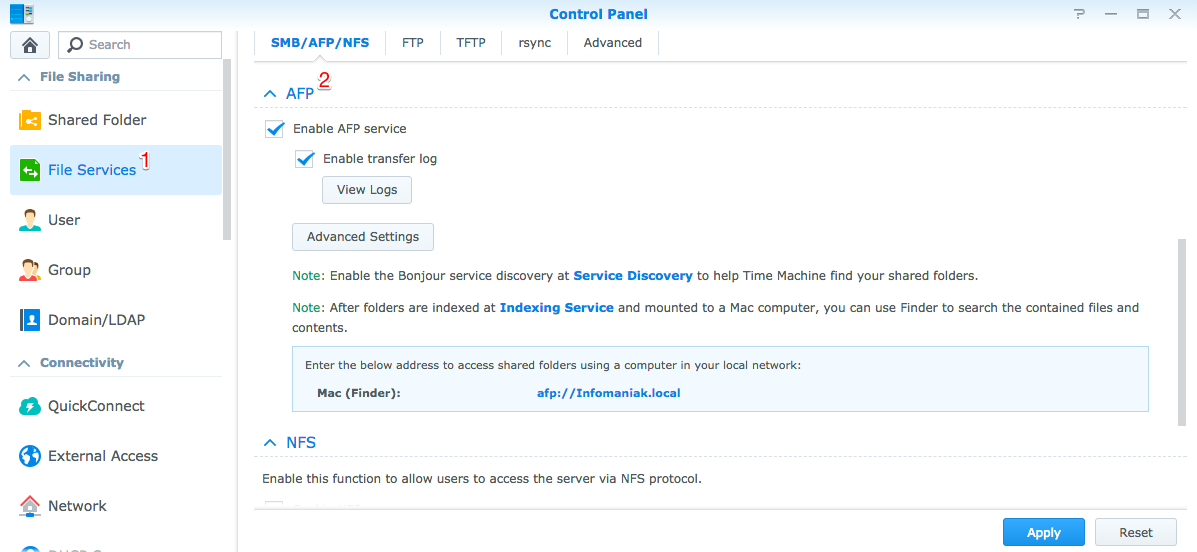
Enable AFP service.
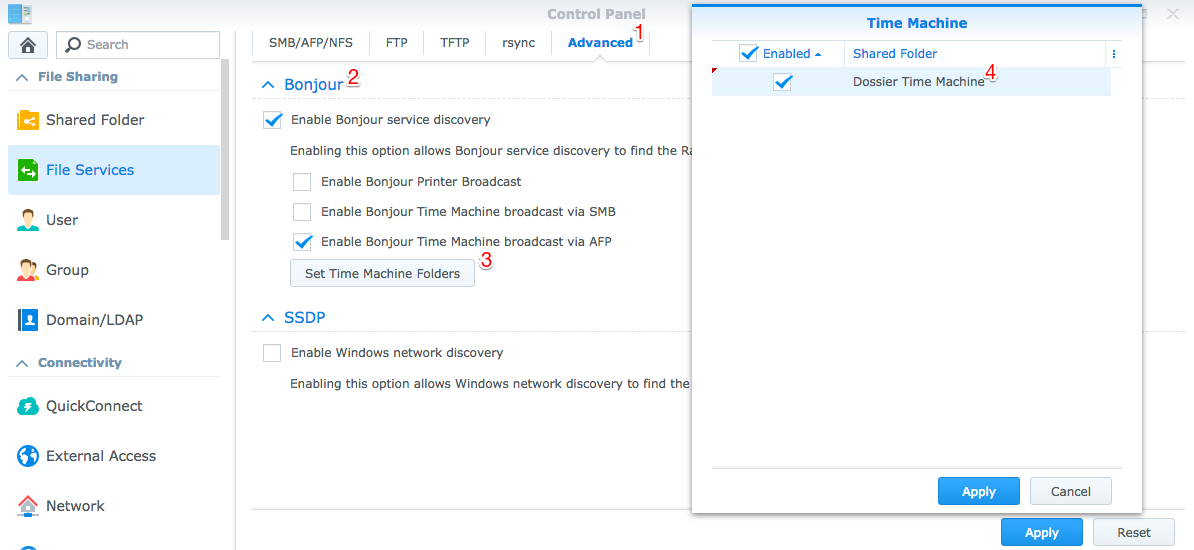
Then go to the Advanced tab to finish configuring the services.
Appoint the Time Machine folder as indicated on the image above.
Now that your Synology NAS has been configured, you are ready to launch your first Time Machine backup on your Mac 🙂
Launching Time Machine on your Mac
1. Load the shared Time Machine folder on your computer
In the Finder, press or go to the Go menu > Log into the server… Then enter your Synology NAS address indicated in your Infomaniak admin console.

Add your Mac’s Time Machine start-up disk in order to systematically display it (load it) when starting up your computer. To do this, open the System Options on your Mac, go to Users and groups, select your user account, and add the backup folder from the Opening tab.
2. Appoint the Time Machine folder as the backup disk
Go into your Mac’s Time Machine options and choose the remote Time Machine disk (your Synology NAS) as the backup location.
Select the option “Encrypt backups” then launch your backup 🙂
As with an external hard disk, if you log out of your usual network, you will have to log in to your remote disk (Synology) again in order to automatically carry out the backups.

No comments
No comments yet.