This article explains how to connect your Synology NAS to a VPN.
Following this procedure, you will be able to access your remote NAS as if it were part of your company’s or your home’s local network. This guide is also applicable to connecting a Synology NAS to commercial VPN services.
1. Activating QuickConnect
It is important to keep in mind that when a Synology NAS is connected to a VPN, its IP address is replaced by the VPN’s instead of the fixed IP supplied by Infomaniak or your Internet service provider. In order to ensure access to your Synology, you need to either know the IP address assigned by the VPN server or create a dynamic access address which will take into account the change of IP address. In the latter case, we recommend that you enable QuickConnect, a solution supplied by Synology which allows the complexity of the network settings to be bypassed easily.
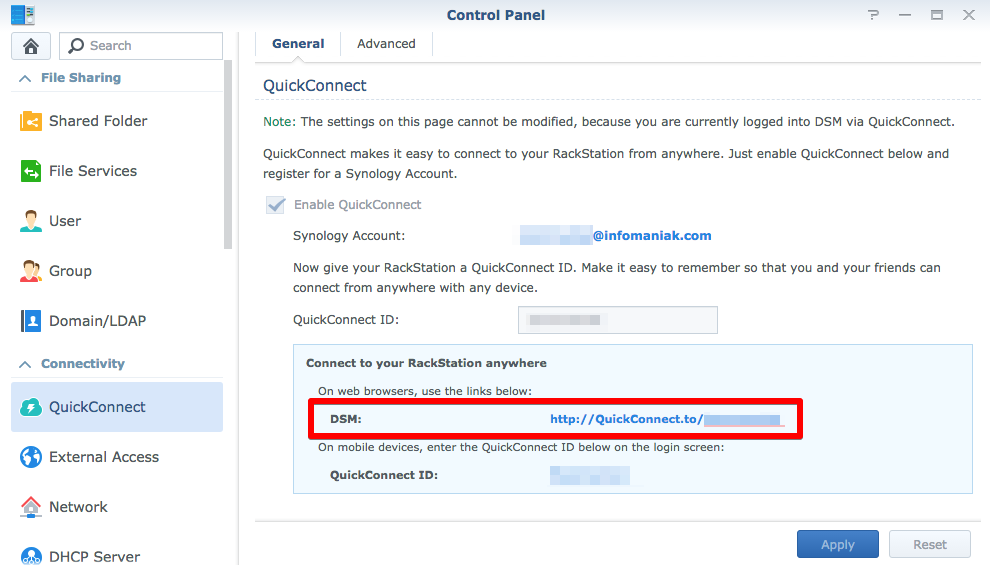
Start by enabling QuickConnect from your Synology settings. If necessary, you will be asked to create aSynology account and you will then be able to freely customise your QuickConnect ID. The above address in red corresponds to the new address that you will need to use to access your NAS.
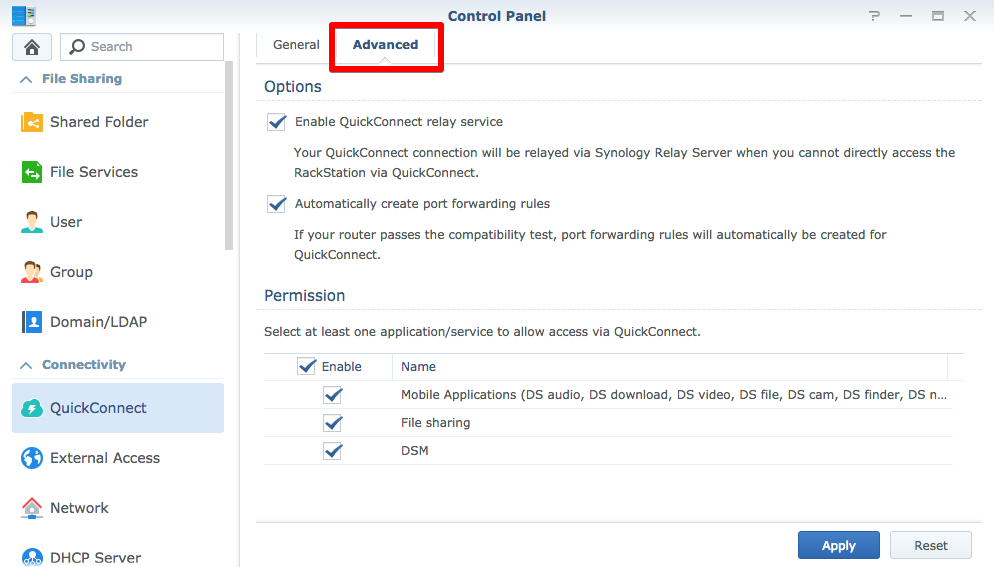
In the QuickConnect options, enable the permissions as shown in the image.
2. Enable OpenVPN
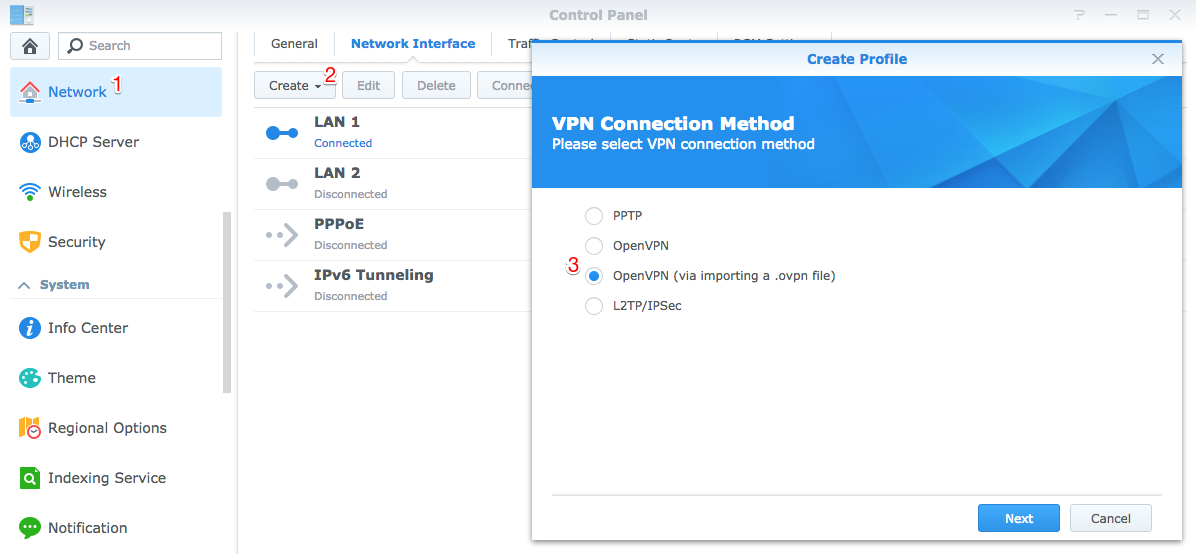
In the Network heading in settings, choose OpenVPN as a login method.
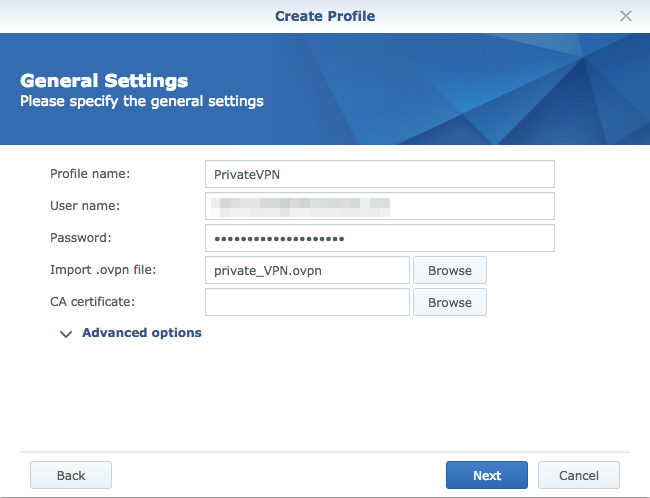
Enter your user name and password (the ones for your VPN) then import the configuration file .ovpn supplied by your network administrator or by the website for the VPN service of your choice.
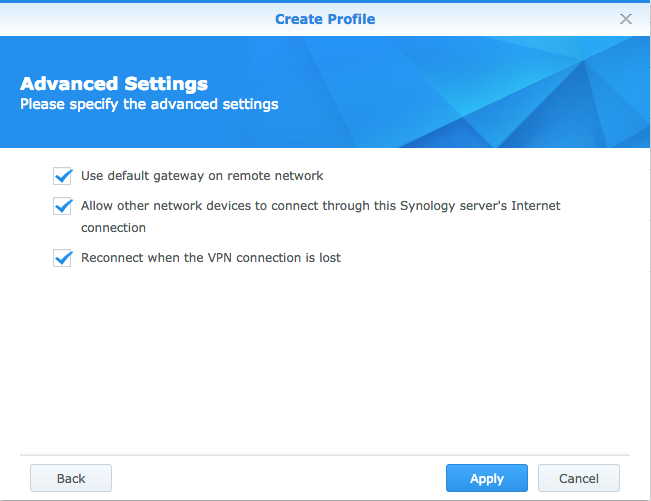
Enable all three options above to ensure connectivity.
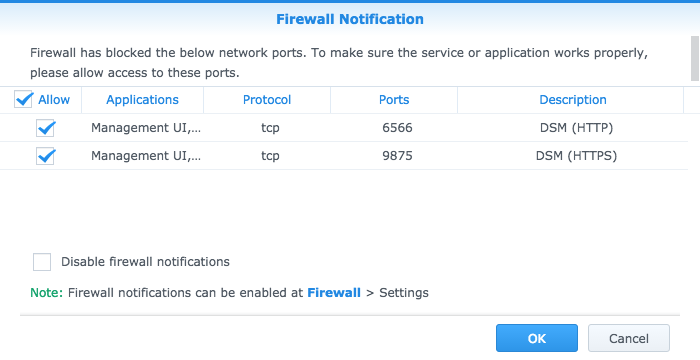
If the firewall window is displayed, authorise the protocols mentioned above.
3. Logging into your VPN
Now that OpenVPN and access to Synology NAS have been configured, you are ready to log into your NAS in the VPN.
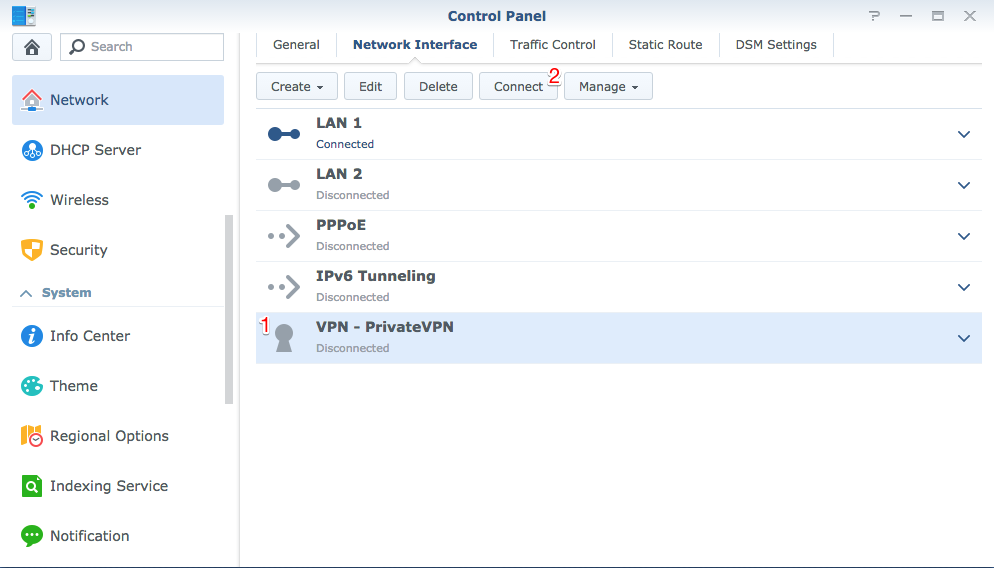
Select the newly created VPN connection and click on Connect.
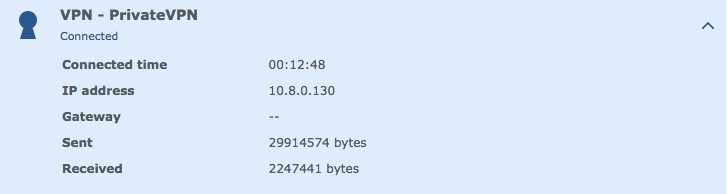
The connection will appear in a few moments and you will need to sign in to your Synology again.
4. Accessing your Synology NAS
Enter the QuickConnect access URL (indicated in the first illustration in this guide) in your browser and log in using the usual user name and password for your Synology NAS. If there is an error, empty your browser’s cache and restart it before signing in again.

No comments
No comments yet.