Creating your first website with Infomaniak’s WordPress themes
Published on January 2, 2018 by Team Infomaniak
Do you want to create your website easily yourself? With Infomaniak, creating a website with a professional design is child’s play. Thanks to a simple and intuitive interface, you will be able to create your website with no technical expertise in a matter of minutes.This article will help you to throw yourself into creating your website. You will learn step by step to make a site with a homepage, blog articles and a contact page.
If you want to trust a professional in your local area with the creation of your website, do not hesitate to launch a call for tenders (it’s free and there is no commitment) to find a well-priced and recognised Webmaster among our 900 partners.
WordPress, the most powerful tool for creating an evolutive site
With Infomaniak’s WordPress hostings, you have a powerful and evolutive tool for creating websites: WordPress. Besides the fact that it is free and simple to use, one of the many advantages of WordPress is its large ecosystem of additional modules. This will allow you to improve your site over time in order to always be on the right page.Thanks to our assistant, WordPress can be installed in a few clicks. This guide shows you, if you need it, the steps to follow to start automatic installation of WordPress. It’s quick and easy.
A professional theme for an attractive site

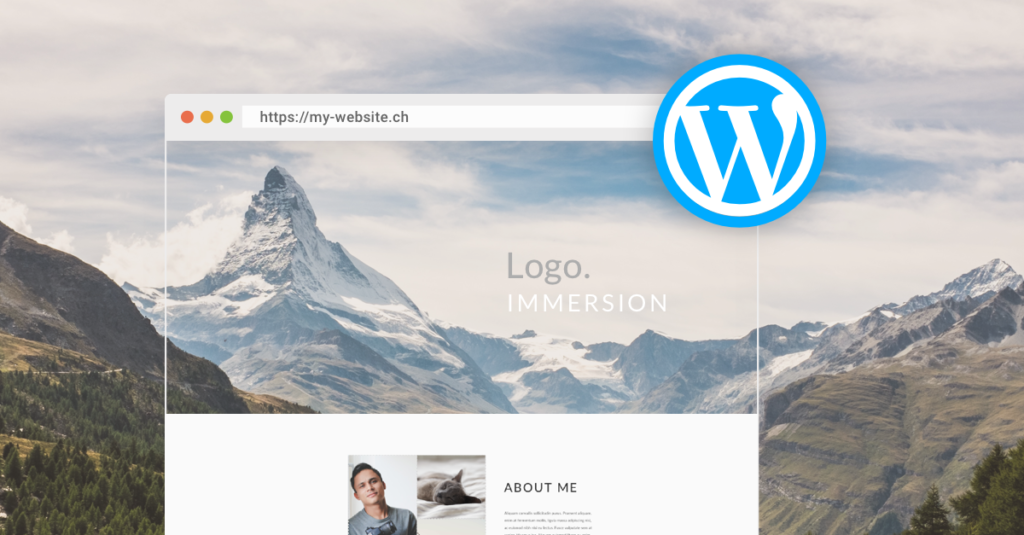
We have designed two easily customisable site models: a one-page model and a traditional model with several pages.
- While installing WordPress with the easy mode,Infomaniak automatically configures a professional theme. You only have to choose whether you want to create a site with several pages (see an example)or a “one-page” site (see an example).
- With our assistant’s advanced mode, you can choose the theme you want from a selection of over 80 professional themes. Infomaniak’s Web hostings allow you to access all of the Elegant Themes catalogue for free (themes and extensions).
For you to follow this guide, we will start from the assumption that you have installed WordPress with the easy mode and chosen to create a site with several pages. Thanks to the flexibility of WordPress, you will always be able to choose another theme afterwards if necessary.
Your first steps in WordPress
Once you have installed WordPress, you just need to go to the address my-domain-name.com/wp-admin in order to log into the WordPress control panel. It is from this interface that you can manage the content (articles and pages) and the appearance of your site. Do not hesitate to add this page to your favourites in order to be able to get back to your site management interface easily later.To display your website as visitors see it, just click on the name of your site at the top left of the screen. You can then go back to the WordPress control panel by clicking on the same place again.
The following video offers a summary of what we have just seen:
Congratulations! You have already acquired the essential basics of WordPress.
Modifying the homepage with your content
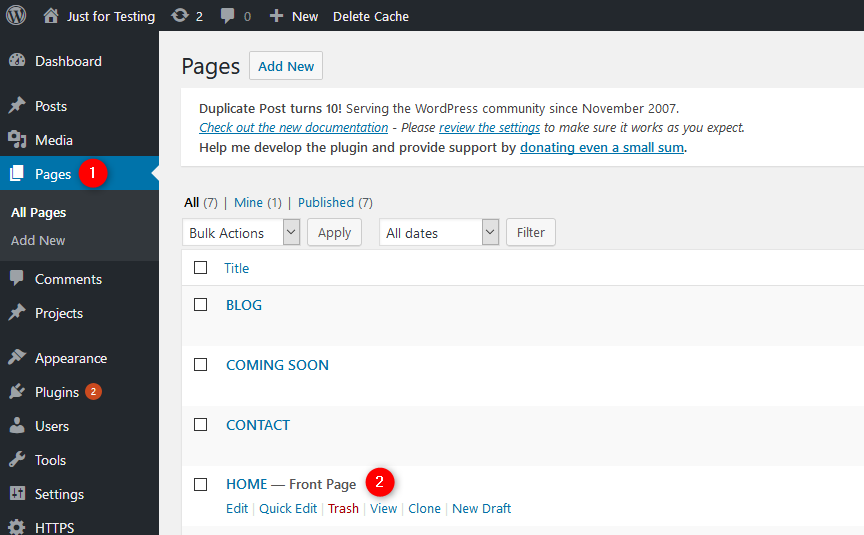
Now that you know how to log into the interface which allows you to modify your site, we are going to show you how to customise your site’s content. In this example, we are going to work on the homepage. To manage your site’s pages, click on Pages (1) from the main menu on the WordPress control panel. The list of your website pages is displayed and you just need to click on the title of the page you want to change. In our example, we are going to click on HOME (2) as we want to change the homepage.
We recommend that you use the Visual Builder mode to make changes to your pages. This is the most intuitive way to change your pages in the way you want. All your changes will be presented as they are displayed to your website visitors. In order to enable Visual Builder, just click on the following button:

Once Visual Builder has been enabled, you can click directly on the elements to be modified. Hold your mouse over the different parts of the site (images, text, intersections, etc.) to highlight them and for customisation options to appear.To save your work, click on the violet-circled “•••” at the bottom of the screen to display the menu, then click on the Save button at the bottom right.
Well done! You now know how to modify any page of your website. By copying your homepage, you can easily create and customise more pages.
The difference between articles and pages
WordPress offers two types of content: pages and articles. It is useful to have a good understanding of the difference between articles and pages in order to get the most out of the potential of WordPress.Pages make up the fixed part of your site. They are designed to stay there and generally consist of a site’s homepage, contact page and services pages. Articles are a more fluid content and are presented in the Blog page of your website. Like traditional press, they integrate chronologically under headings and in a predefined format.
In short:
- pages are the static content of your site (homepage, contact, services, etc.). The homepage for the site infomaniak.com, for example, is a static content which remains valid over time.
- articles refer to your site’s blog or chronological content (news, latest advances, etc.). What you are reading now, for example, is a blog article. This is dated and may no longer be valid in 5 years.
In order to manage articles on your site, go to the left-hand menu and click on Articles. A list of sample articles is displayed. At this stage, you can simply delete them and add your own.Creating articles is very simple as it reproduces the same interface as a conventional text. You can therefore type it straight into the window and use text-formatting tools, insert links or images, etc.Unlike the pages, we recommend that you use the WordPress default formatting mode rather than using Visual Builder to create your articles. This is the best way to ensure that you do not alter your articles any time you decide to evolve your site by using a new theme.When you have finished your article, click on Publish at the right of the screen. Your article will appear automatically on the Blog page of your website.
Now that you know how to edit pages and articles, you just need to discover how to customise your site’s menu. You will then have all the basic keys to start creating your website!
Customising the menu to navigate your site
Positioned at the top right of your site, the menu is an important part because it allows your visitors to navigate between your different pages. By default, every new page created is automatically added to your site’s main menu.To change your site’s main menu, go to the heading Appearance > Menus in WordPress. In this screen, you can move the elements listed on the left in the menu shown to the right using drag-drop with your mouse. Once they are placed in the menu, the elements can be ranked in the order you want. Select one element and move it downwards and release it in the place you want it.You can also create a hierarchy for your content by creating sub-menus. To do this, just drag an element from the menu to the right so that it is linked to a parent element above.Finally, do not forget to save your changes.
Launching your WordPress site correctly
Congratulations! You have just created your first WordPress site using this guide.
***
Site Creator, an easier alternative to WordPress for creating a website with a blog and an online store
If you are looking for an easier alternative to WordPress to create your website, Site Creator is a choice worth considering. Unlike WordPress, which takes a little time to master, Site Creator is highly intuitive and can be used immediately. It is a turnkey tool that allows you to create a professional website with a blog and an online store in just a few clicks, without needing any technical skills.
What’s more, Site Creator is included free of charge with Infomaniak’s web hosting solutions and Cloud Servers. That means you can test it without any risk while having a WordPress website on the same hosting solution. But that’s not all: by choosing Site Creator, you’re boosting your project through a local company that’s committed to privacy, employs all its staff in Switzerland and makes no compromises with regard to the environment.
Making your site yourself is something to be proud of and develops very useful new skills. That is the reason why we aim to foster the autonomy of our clients by creating easy-to-use tools and practical guides which are both effective and easy to follow.
No comments
No comments yet.