Installing an SSL Let’s Encrypt certificate on a Synology NAS
Published on January 12, 2018 by Team Infomaniak
With up to 40 TB of storage space, Synology NAS servers hosted by Infomaniak are ideal for remotely storing or backing up large quantities of data which can then be accessed at any time, from anywhere.
At Infomaniak, your Synology NAS is hosted in a highly secure datacentre and benefits from a fast and reliable infrastructure. Powerful tools with various features, Synology NASs are genuine, fully customisable mini servers. That’s why they are the preferred choice of companies wanting to protect their data while enjoying high availability.
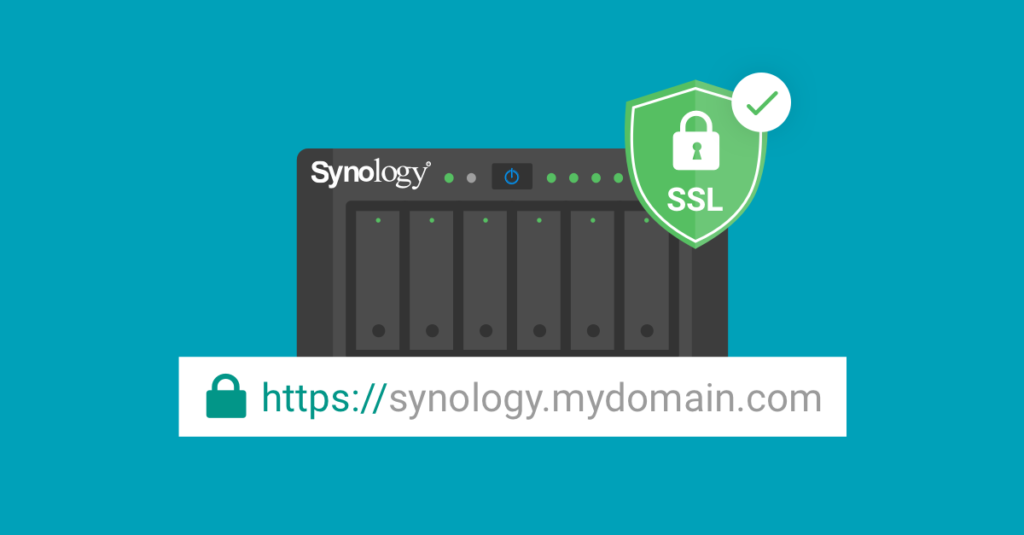
Using encryption to protect information exchanged between your web browser and your NAS is an important aspect of security. By installing an SSL certificate on your Synology, all of your data, including your access credentials and communications, are encrypted. The technology behind this security is exactly the same as that used when you access a site over a “HTTPS” connection.
By default, Infomaniak’s Synology NASs come with an unsigned SSL certificate. However, this type of certificate is not verified by a trusted Certification Authority and therefore triggers security alerts in web browsers.
To eliminate these warnings and adhere to security best practices, you can easily install an SSL certificate signed by a browser-recognised Certificate Authority: Let’s Encrypt.
Installing an SSL LE certificate on a Synology NAS
In this article, you will learn how to install a signed SSL certificate on your Synology NAS hosted by Infomaniak in just a few steps. To benefit from greater security, we recommend that you follow our 10 tips for securing access to your Synology NAS.
1. Link your domain name to your NAS
The SSL certificate issued by the Certification Authority guarantees the ownership of the domain name. This is why you need to start by linking your Synology NAS to your domain name in the Infomaniak Manager.
If you don’t have one yet, you can buy a domain name from Infomaniak to benefit from the best conditions and features offered by the Manager.
To link your domain to your NAS, access the dashboard via the “Synology” section of the Manager. Next, click “link a domain” in the bottom right. Register your chosen sub-domain (new access URL to your NAS) and click confirm.
2. Install the SSL certificate on your NAS
Before you do anything… To benefit from the Let’s Encrypt certificate management, your Synology NAS must have been updated with the latest version of its DSM (Disc Station Manager) operating system. This is a necessary prerequisite for the installation of a Let’s Encrypt SSL certificate and takes just a few minutes.
To install this update, go to the “Update” tab in your NAS control panel and select “DMS update”.
Installing a new SSL certificate Once updated, your NAS is ready for the installation of the Let’s Encrypt SSL certificate. To begin, go to the control panel in your Synology NAS and complete the following steps:
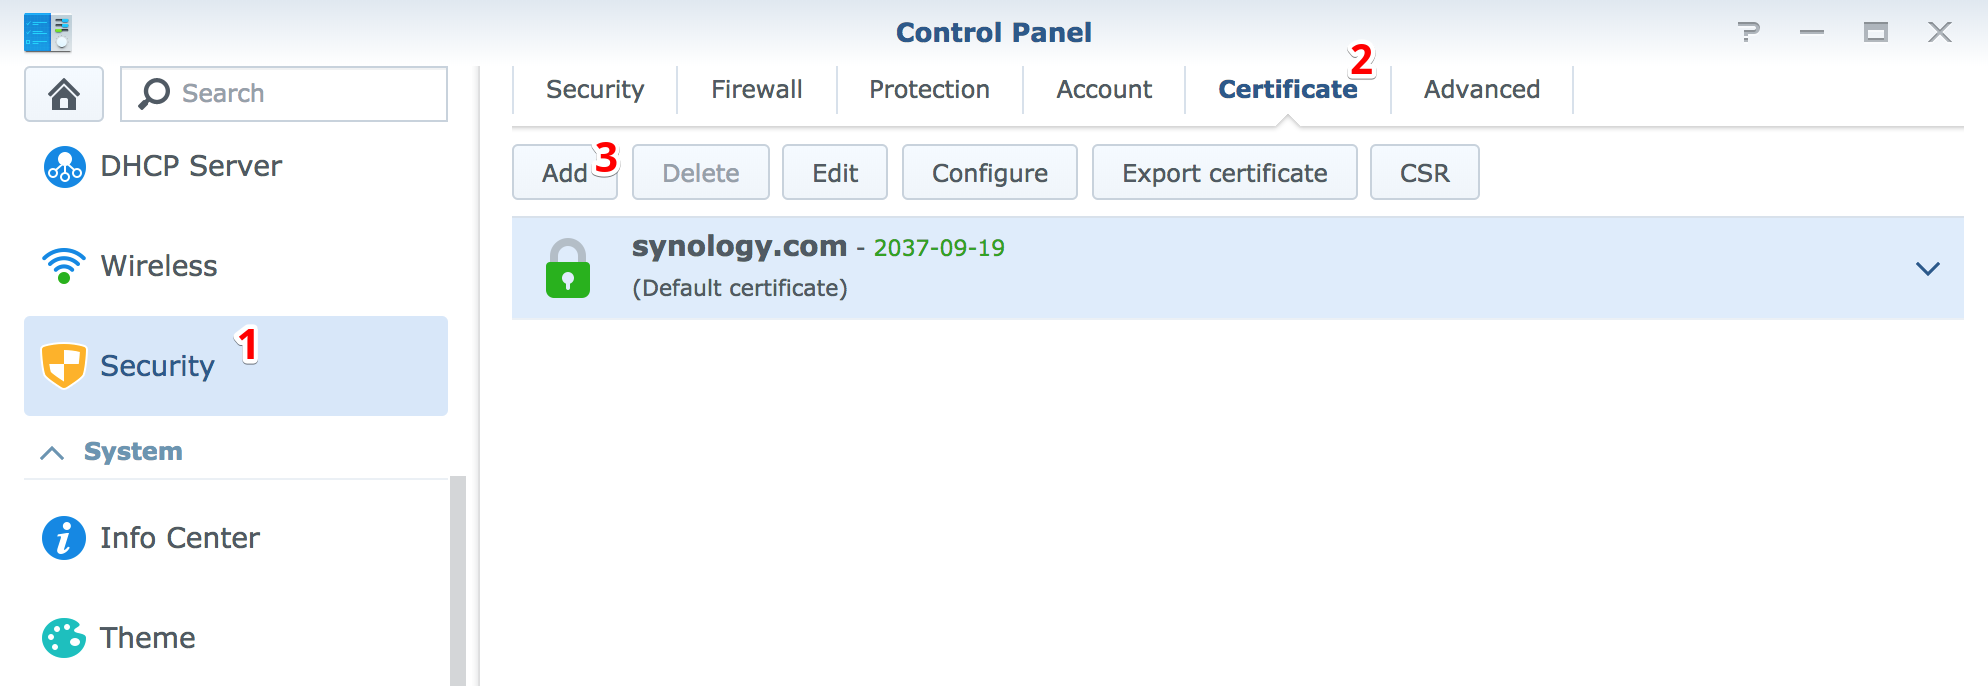
Perform the following actions in the control panel.
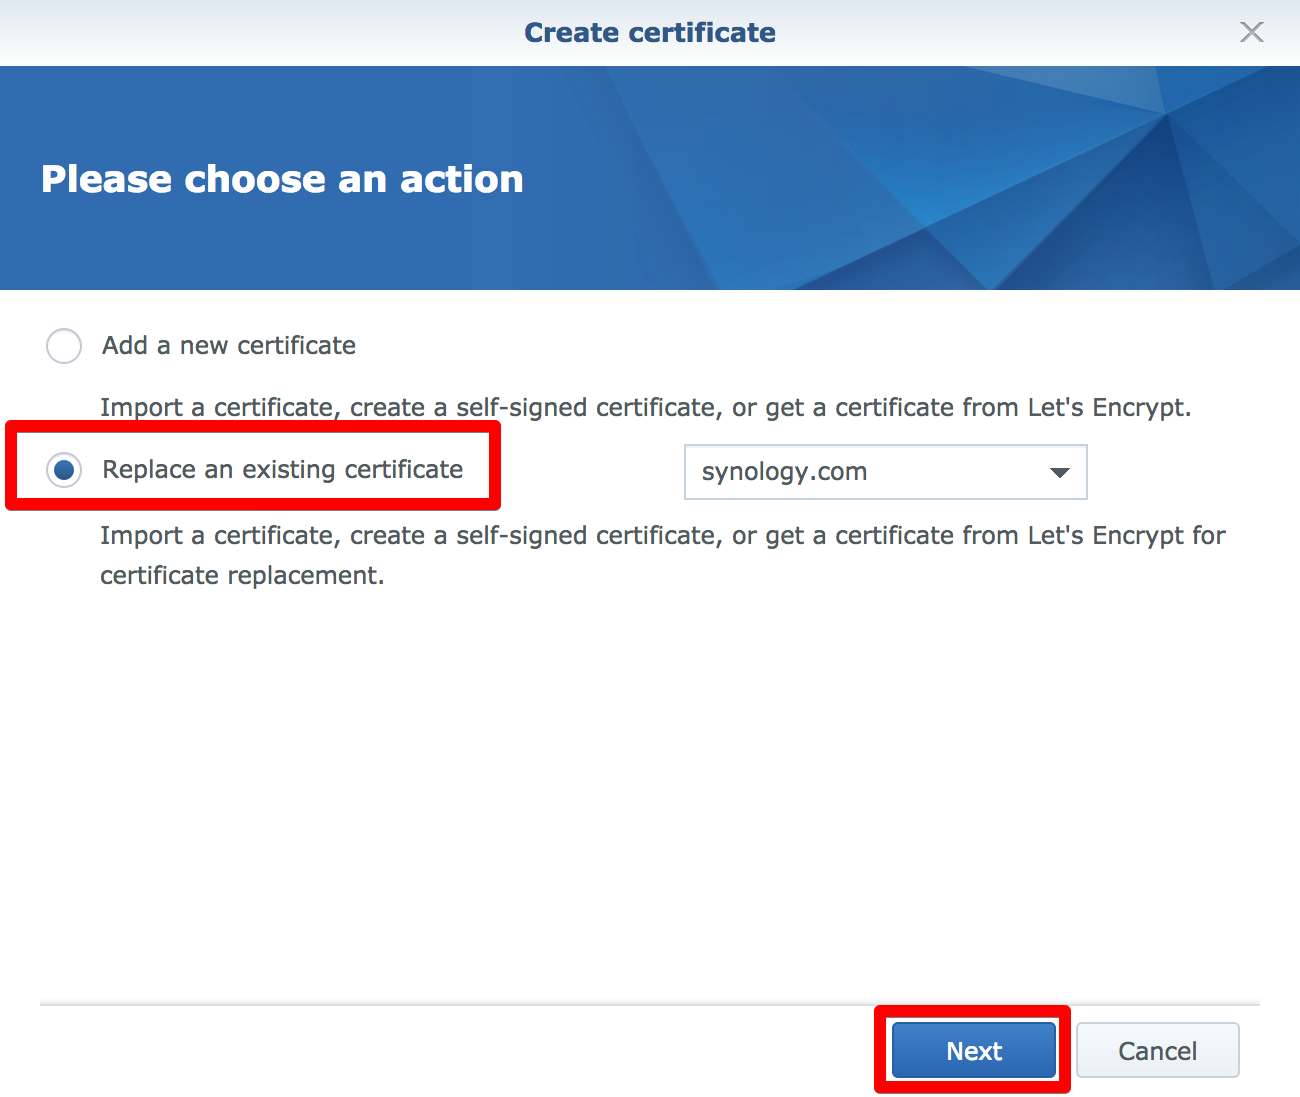
Select “Replace the certificate” and continue.
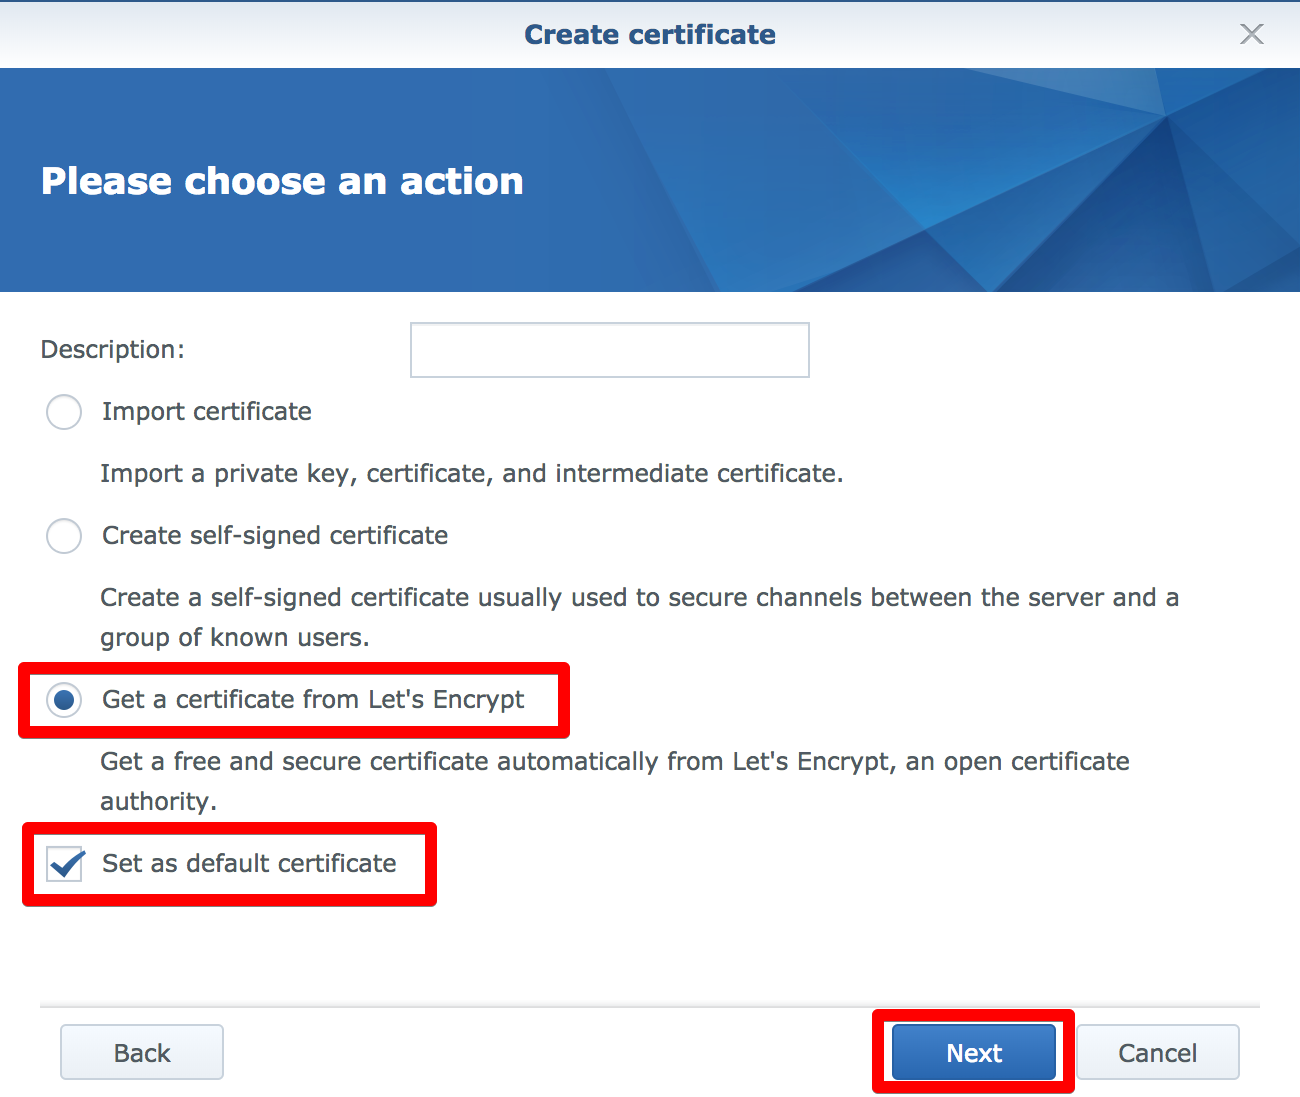
Next, select “Get a Let’s Encrypt certificate” and specify this as the default.
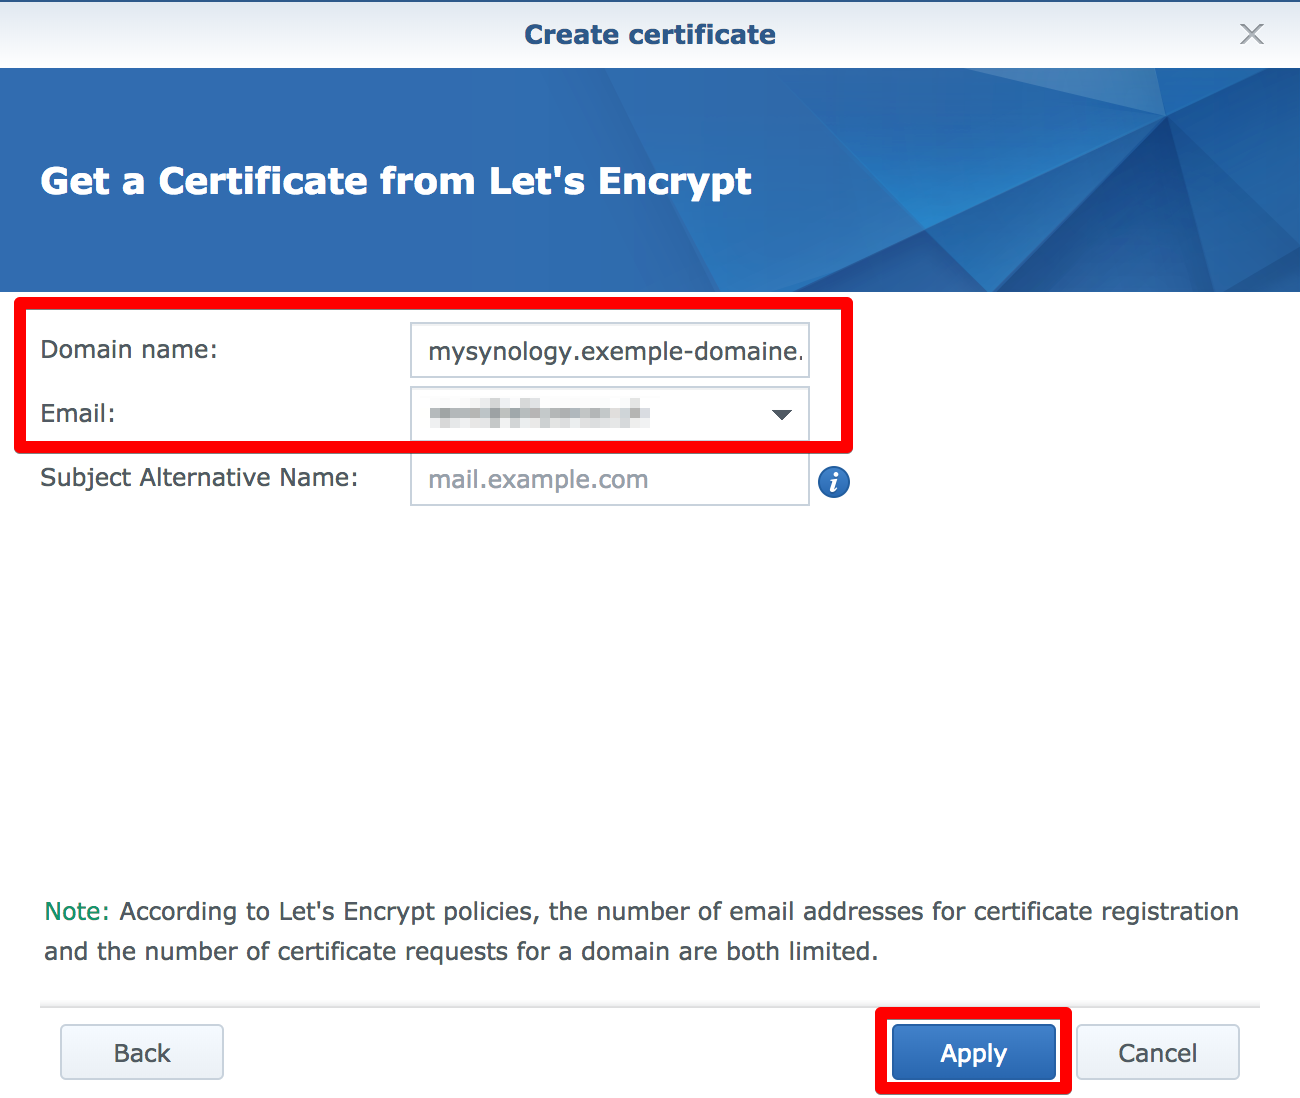
Enter the access URL that you created previously in your Infomaniak Manager along with your email address.
This step ensures that the new Let’s Encrypt SSL certificate encrypts all data exchanges when you access your NAS via its access URL in HTTPS. You can now configure your Synology NAS to redirect all exchanges to HTTPS.
3. Redirect all access requests to HTTPS
As mentioned, you can configure your Synology to systematically and automatically redirect all access requests to HTTPS.
To do this, go to the “Network” section of the DSM, then “DSM settings” and select “Redirect HTTPS connections to HTTPS automatically”. When you have applied the changes, all connections to your NAS will use the encryption provided by the Let’s Encrypt SSL certificate.
Your Synology NAS’s Let’s Encrypt certificate will be automatically renewed every 90 days.
No comments
No comments yet.